Seeing a water stain after a rainstorm can be unsettling. Maybe it’s a small brown spot on the ceiling or a musty smell that only shows up after heavy weather. Many homeowners in Pasadena, San Marino, South Pasadena, La Cañada Flintridge, Sierra Madre, Altadena and surrounding Southern California cities think, “It’s small… I’ll wait and see.” That’s a natural reaction, but it’s also one that can lead to far more costly repairs down the road.
Roof leaks don’t usually get worse in a straight, predictable line. Water often travels along structural wood, insulation, and underlayment — spreading silently before it becomes obvious inside your home. The most serious and expensive leaks typically start at weak points like flashing, valleys, and roof penetrations (vents, skylights, chimneys) long before you see any sign on the ceiling.
This guide explains what’s happening, what you can do safely today, and how to think about roof leak repair and inspection in a way that protects your home and your budget.
What to Do First (Quick Guidance)
If a ceiling stain changes after rain, assume it’s active. Don’t wait for the drip to “prove” it.
Most hidden leaks start at flashing, valleys, or roof penetrations — not from the middle of a roof plane.
Your immediate actions are about damage control: catch water, protect valuables, and document what you’re seeing.
Delaying often expands the repair scope because water can impact insulation, decking, fascia and interior finishes before you notice.
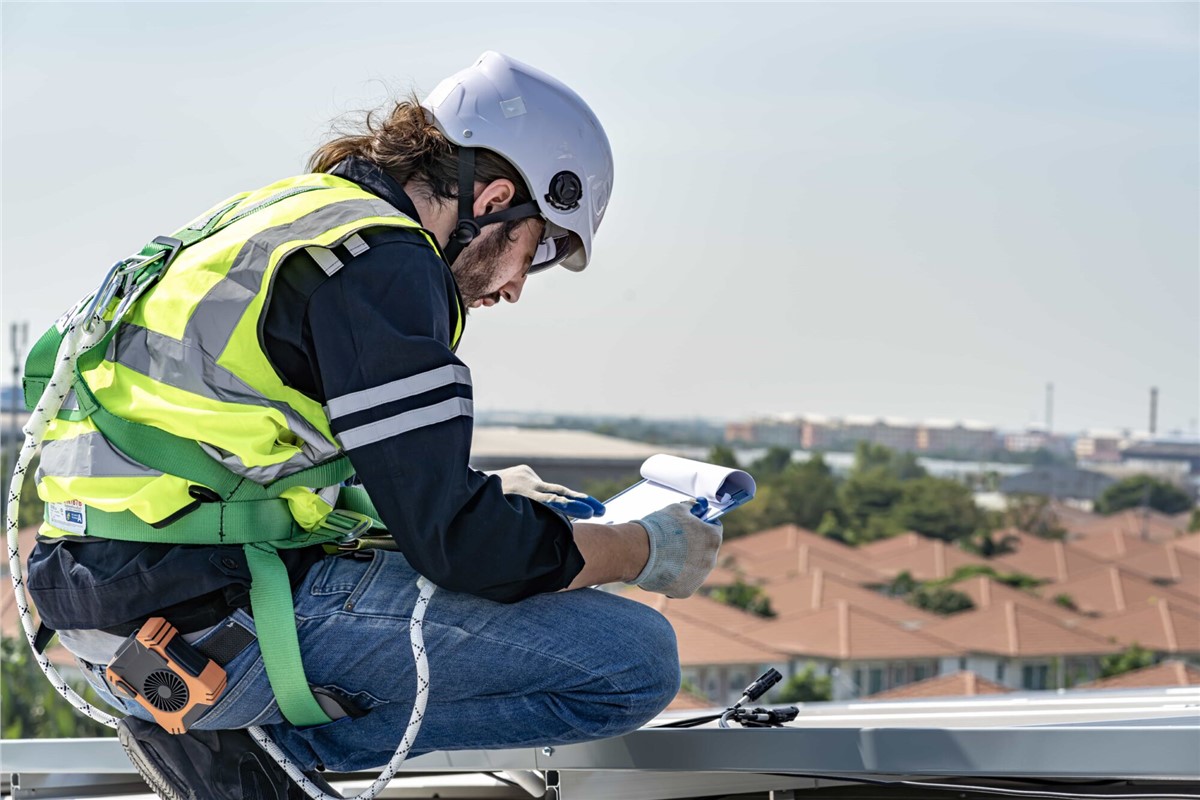
A thorough roofing inspection should include clear photos, an explanation in plain language, and well-explained options — not vague guesses.
Why Roof Leaks Get Expensive
The stain on your ceiling is often just the end of the trail, not the beginning. When water gets under roofing layers, it follows paths of least resistance. Over time, that hidden moisture can:
Saturate attic insulation, reducing energy efficiency
Soften or rot roof decking
Travel along framing and emerge in a different room
Cause drywall bubbling, sagging, or discolored ceilings
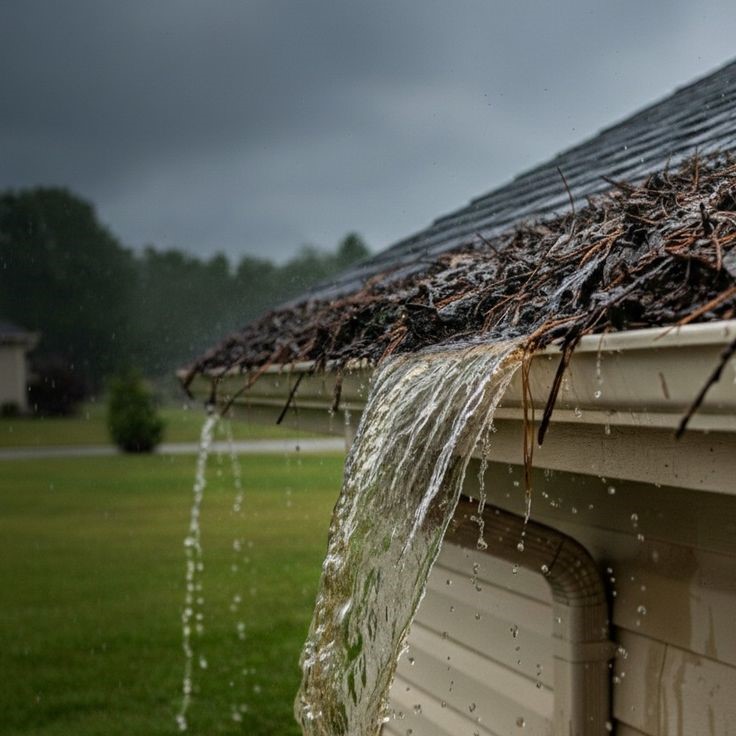
Impact roof edges, fascia, and gutter interfaces
Encourage mold growth in attics and cavities
Minor roof repairs done early are often far simpler — and less expensive — than fixes after water has moved through multiple layers of your home’s structure.
Common Sources of Roof Leaks
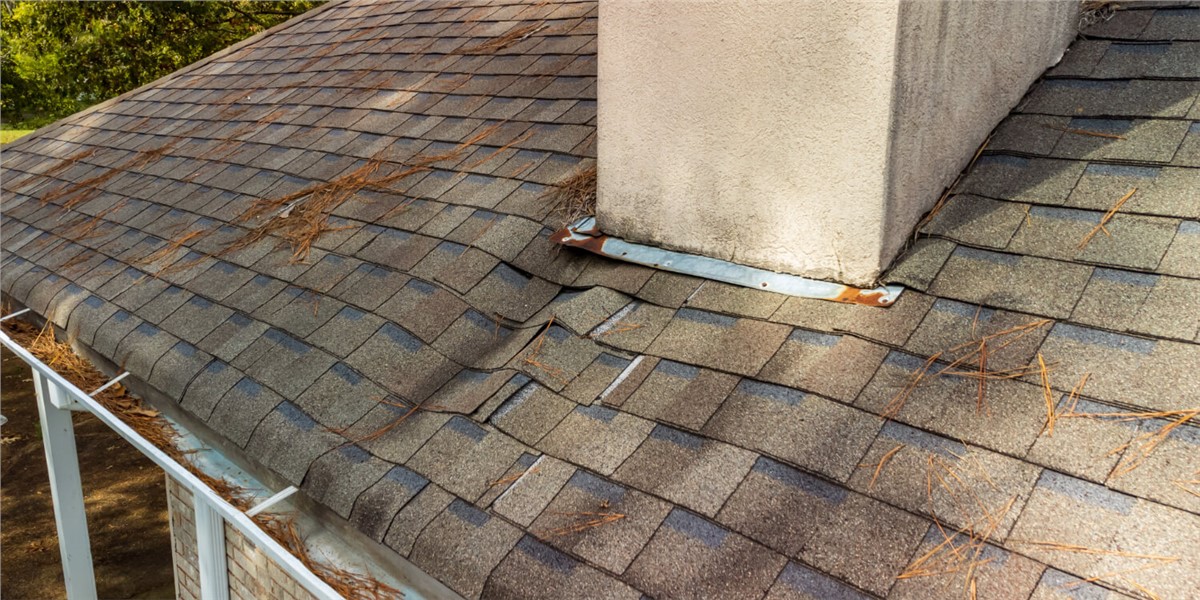
Flashing and Transitions
Flashing protects areas where roof planes meet walls, chimneys, skylights, and dormers. When flashing corrodes, shifts, or was installed poorly, water can sneak in.
Roof Valleys
Valleys act like water highways during rain. If debris builds up or the valley details wear, water can find its way under shingles and into vulnerable areas.
Roof Penetrations
Exhaust vents, plumbing stacks, skylights and solar mounts are all penetration points where the seal can fail. These small openings are common origins of leaks.
Underlayment Exposure
Underlayment is a backup layer beneath your roof covering — not a permanent barrier. When shingles or tiles fail, the underlayment can soak up moisture and degrade quickly.
Safe Steps You Can Take Now
You don’t need to climb on the roof to start doing the right things.
1. Confirm If the Leak Is Active
Lightly feel the stained area with a clean cloth. Dampness or soft drywall suggests ongoing water entry.
Outline the stain with a pencil. If the outline grows after the next rain, you know the issue is active.
2. Control Water and Protect Your Space
Move furniture and electronics away from the wet area.
Place a bucket under active drips (a towel inside helps reduce splash).
If a ceiling bubble is forming and you feel comfortable, a small controlled puncture at the lowest point can release pressure before it pops unexpectedly.
3. Document What You See
Take photos of:
Ceiling stains or bulges
Any water dripping
The roofline from the ground if you can spot missing shingles or visible damage
Photos help a contractor diagnose the issue and can support discussions with insurance if needed.
4. Avoid Quick DIY Patches
Avoid:
Applying random caulk or sealant
Using roofing cement without understanding the source
Nailing down loose shingles without a plan
These quick fixes often disrupt how the roof sheds water and can create new entry points.
When to Call a Roofing Professional
Contact a Pro Sooner If:
You have active drips
Ceiling stains expand after rain
You notice soft spots or sagging drywall
You see visible roofing material damage from the ground
Schedule an Inspection Soon If:
Musty smells return after storms
You’ve had wind events recently — lifted shingles can be subtle
You’ve had previous repairs return in the same area
Timely inspection helps both protect your home and keep repair costs from growing.
What a Good Inspection Should Include
A clear, professional roofing inspection typically covers:
Roof surface review for leaks, broken shingles and weak points
Flashing checks around penetrations and transitions
Valley and ridge evaluations
Attic inspection (where accessible and safe) for hidden moisture patterns
Photo documentation and plain-English explanation of findings and options
This level of detail helps you understand the problem and choose the best course of action for a long-term solution.
Subscribe to Green Ladder Roofing's Blog


Comments